After we had looked into all of these and found common trends we were able to gain a rough idea of how we would want ours to look like and made rough sketches and then filled them in in more detail giving some description of why we chose the colours such as lots of metallics and different shades of blue. From here we could start to make our assets on Maya itself. We used the built in polygon meshes such as cubes and rectangles to start off with to get a basic shape for our assets which would be our main building block. We were then able to use tools such as the extruder tool or add sub divisions of edge loops to alter its shape. I started off with my building which was the longest time I spent on the construction and then my car which I felt I rushed a bit and the other assets followed. Once all of the assets were completed I could then texture them and this required downloaded textures or the ones Maya has to offer. But to get our environments more realistic I had to UV map a lot of my imported textures so that it fit my faces and the stitches matched up.
Thursday, 30 June 2016
Master Scene Plan with annotations.

The use of the abstract art on the buildings such as the one to the left of the main building which has obscure shapes at both corners as a sign of future art and style.
Textures research

Texture for my Grass - http://www.123rf.com/photo_13150589_seamless-artificial-grass-field-texture.html
Texture to be edited and used on a 'computer' in shop window -http://6.darkroom.shortlist.com/1200/b737511fd4a8ae81125082effc607a78:33edace9ce6c329678ea618c9a9bb89a/apple.png
Used for my security camera face - http://www.backgroundsy.com/file/large/camera-lens-icon.jpg

Background for my 'computer' - http://pre12.deviantart.net/430b/th/pre/f/2009/107/2/1/blue_wallpaper_aurora_by_thedisturbed0ne.jpg

Air Vent - http://www.mayang.com/textures/Architectural/images/Grilles%20and%20Gratings/air_conditioning
experimental Mirror Texture - https://t1.rbxcdn.com/3c285ca87365e63d232e35cc5a09a950

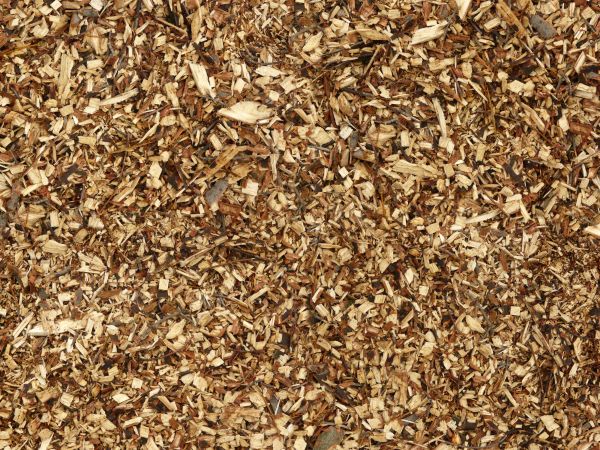
Wood chip around my play area - http://texturelib.com/Textures/debris/wood%20chips/debris_wood_chips_0004_01_preview.jpg

Side building texture - https://s-media-cache-ak0.pinimg.com/236x/2c/19/e6/2c19e6faac635cff1f9cce38a6bd1596.jpg
The main use of default texture that i used was a PhongE and Lambert based texture to give it either a dull texture for say the roads but then other assets and objects needed to have a shine to it and so a PhongE was more appropriate as it had a reflective to it. The reason i chose to do this was because I felt it was more appropriate to spend my time modelling and it also didn't take away from my main assets. But also it seemed to fit my style and futuristic 'efficiency' look.


Lambert used preview
PhongE used preview
Tuesday, 21 June 2016
Monday, 13 June 2016

Storyboard Plan Drawn
This is my story board for my environment and this is the angles I will place cameras and display as it clearly shows all of my assets.


Thursday, 9 June 2016
Evaluation of Futuristic Environment
Introduction
The task brief is to create a futuristic environment using a 3D software called Maya. The City environment could be interpreted however you wanted but I went for a Utopian eerie city. The main focus however was creating assets that are recognisable but futuristic and for me this meant smooth finishes which is why I went for a simple reflective theme.Environment assets Ideas and Planning
I got my ideas through doing lots of initial research and finding an inspiration for a video game environment. One of my biggest inspirations was the game mirrors edge as I believe that this future like environment was put across clearly and yet simplistically. At first I was going to include lots of advertisement however I felt that it might feel like it was still in the present which was not the aim so instead I applied lots of modern themes such as plain and simple textures. Additionally, if I were to have lots of different company logos I would have to alter them all so that I wouldn't be evading or breaking any copyright laws and so I kept them pretty much to a minimum. Being fairly new to Maya I knew I had to pace myself and that everything I made wouldn't turn out how it looked in my head which is why I planned my asset creation strategically, I wanted to make basic models of each of my assets so that I had a starting ground for everything rather than having one of my assets being to a poor standard in comparison to others it allowed me to keep on adapting and changing the main model itself once I had learnt a new skill. This might have been more off putting if I had made one or more of my assets and completely textured them as I would then have to alter all of the next steps and so by progressing with each assets at the same time I was able to overcome this problem. I also knew that some of my assets such as my skyscraper would take a prolonged period of time over my bin for example due to its scale and detail and so when modelling I might have spent a larger proportion of a lesson working on just that. However, one thing I think I spent way too long on was getting a real time reflective texture on my reflective apple statue. This took me an extremely long time as it was also one of my first assets I started to construct. This meant that I had to watch various tutorials. Another thing I think I could improve on is my car but more specifically my bending and molding of polygons as I found it very difficult and judging by my end product could have been massively improved just by toughing up its exterior. Finally I also realise that I should have set my self achievable goals as I feel some of my planning such as for my car I hoped it would be done in a couple of lessons but actually took a little longer and was very complex.
Original Plans and changes
My building remained pretty clear in my head throughout of a tall reflective building towering over the city acting as a head quarters/ intimidating building as it correlates this idea of a dictatorship in plain sight. Towards the end I also had the idea to make two with a glass platform across connecting the two just as a cool feature and all round add to my city. One thing I think would have made my piece more professional is if I were to have a roof top pool in the skyscraper just so that I showed my ability with water/ particles. My bin asset also turned out similar to my original plan as I wanted it to be. I wanted a incinerator bin that would immediately get rid of any rubbish, Therefore I also stayed with the theme of caution tape as a detailed texture. The port on top still remain as a charging/ electrical output implying that technology is a big part in my future environment. I kept the simple silhouette of a bin, but its metallic look and minor details help construct a futuristic trash disposal unit, however, I also added in a big skip type bin behind the shops as I felt the idea of a future environment couldn't be overlooked and thinking that it was 10000 years in the future. Once again my street lamp stayed true to its original planning with the detailed 'pad' that goes around the lamp making it look futuristic as it would be a user interface and so could say look at a map, time and do various other extras. The car I found very hard to model and still do not feel confident in constructing full 3D meshes from scratch which I attempted to do for my car. I used various bending tools and SV curve tools but always seemed to end up in problems and so I had to change its look slightly but it still showed similarities and key features from my plan. My shops were almost all through spontaneous creation and I stuck to the reflective theme and followed a trend from high fashion shops such as Louis Vuitton as I feel they have a modern/ futuristic feel through their simplicity and so I used this with a simple repeated patter such as the balls adding texture to my shop front exterior. My historical building was something I added in after all of my other assets as I needed something and some space to fill up along with my Swing which I used a curve tool to construct. Finally, my Sculpture remained true throughout and is my 'head piece' due to the effort in making the real time reflections. I came up with this idea through inspiration from the Cloud Gate or the mirror bean in Chicago.Tools used
One of my most used tools for creating my assets was the extrude tool. This tool allows you to pull out faces from a mesh to form a new shape and add additional surfaces to a shape. This cam in handy when creating my 'historical' building as the whole thing is made from 1 shape. I repeatedly used the extrude tool to make my building higher and thicker so that it looked fitting and aligned as it was all one shape but also gave it an old architecture in comparison to the rest of my future environment. However, With this tool I was also able to move faces inwards creating a windowed like effect which I then applied a separate texture to making it slightly transparent. A second tool I used was SV curve tool, This tool is where you create a line through adding points where you want them which join up to create a line, this helped me create a road that bend around my environment. I used the curve line and selected the face of a rectangle that I toggled to make it road width and height and extruded it to make a road which followed in the path of the line. I learnt this through a video on YouTube and definitely a tool I would like to use more to become good at as you can progresses to make good wires and ropes etc. This way of looking up video tutorials was very helpful throughout the course along with when we had a professional modeller come in and show us new techniques and tools for modelling to gain a sense of professionalism. UV mapping tool was something I surprisingly used less of in my environment than my video game sidekick model as a lot of my building were made reflective and so I used the application of changing its waves to get a reflective texture. However my grass I needed to use UV mapping so that it wasn't too pixelated or looked doggy through overlapping and so i had to use UV shell so that I could alter the way it was positioned and placed on the ground/ faces of a mesh. Cameras and the addition of them was another addition that I had to learn to use as it can boost the overall appearance of your environment by capturing the right angles where you are getting the most in per frame so that when I rendered it through a camera perspective It would render only relevant display. One more tool I used was the built in implementation of shapes such as rectangles, spheres and pipes and this was the main starting block for nearly all of my assets as you use other tools to morph it into whatever shape you want.Key features
My most proud asset would have to be my apple sculpture even though it is simple I put a lot of time into the creation of it moving each vertexes differently as if it was a perfect shape it wouldn't look like an apple and I selected layers of the previously spherical shape and elongated it and then textured it altering its refractive index, reflective index and other aspects that allowed it to look like a mirror rather than just applying a chrome or environment ball texture as it doesn't actually reflect any of its surroundings.
I am also aesthetically happy with my glass walkway above my tower and the tower itself. The unique design gives it a very futuristic look and the large Logo that is on a white metallic banner stands out and ponders lots of questions which I personally like in video games is looking and finding little Easter eggs.
Finally, I think that my swing set it very vibrant and stands out even though it is at the side due to its splash of colour in a what seems to be blinding city-scape.
Finally, the shop fronts I think are really well created as they show off lots of different techniques used and even transferred my Photoshop skills with creating a new apple logo texture to go in the window frame and adding in sub divisions so that I was able to extrude thinner parts or different shapes from the surfaces. It also has a very clean look with the LV standing out and eye catching but in a subtle way.
Additionally when choosing textures I had to make sure that they didn't have any plugs to companies or owned by specific companies for legal issues. To overcome this I found specific websites and also
If I had the knowledge I now have I reckon I would have gone for a similar style but rather than having the two extremes of either reflective or bright colours I would have made it more simple colour and used textures that already show products such as maybe a photo of a overflowing bin and use that on the top face of my bin just to make things clearer. Further more, I might have gone into more detail when planning my colour scheme and download pre-made city-scape just to evaluate the different combinations. If I did this again I would try to make more of the textures myself to avoid any issues but it would also make the texturing a lot easier as I could adjust it myself using photoshop.
Textures
A lot of my environment has a reflective theme which I used to connote immediately a futuristic environment. I did this by adding a blinn texture to a mesh which is already slightly reflective and slightly metallic. This meant that what ever I added after would automatically be slightly shiny. However I then added on a chrome environment ball texture. This made it all reflective however I also added in the ball which was very complex and this made it so that if I wanted to it could be act like an actual mirror. On other assets and platforms such as my grass I had to use different websites to get these textures as a lot of them charge and are copy righted meaning that it is technically illegal to use them without an agreement or permission. This meant that I had to look into what textures I used. I also found a website that allowed people to post their made textures and allowed people to use them for free.Additionally when choosing textures I had to make sure that they didn't have any plugs to companies or owned by specific companies for legal issues. To overcome this I found specific websites and also
If I had the knowledge I now have I reckon I would have gone for a similar style but rather than having the two extremes of either reflective or bright colours I would have made it more simple colour and used textures that already show products such as maybe a photo of a overflowing bin and use that on the top face of my bin just to make things clearer. Further more, I might have gone into more detail when planning my colour scheme and download pre-made city-scape just to evaluate the different combinations. If I did this again I would try to make more of the textures myself to avoid any issues but it would also make the texturing a lot easier as I could adjust it myself using photoshop.
Work flow
Firstly, we had to plan and research around our topic area and we did this through looking at different media types such as video games and magazines and see what typical representations of future environments there are. I looked into products such as Mirrors Edge. After we had looked into all of these and found common trends we were able to gain a rough idea of how we would want ours to look like and made rough sketches and then filled them in in more detail giving some description of why we chose the colour's such as lots of metallic and different shades of blue. From here we could start to make our assets on Maya itself. We used the built in polygon meshes such as cubes and rectangles to start off with to get a basic shape for our assets which would be our main building block. We were then able to use tools such as the extruder tool or add sub divisions of edge loops to alter its shape. I started off with my building which was the longest time I spent on the construction and then my car which I felt I rushed a bit and the other assets followed. Once all of the assets were completed I could then texture them and this required downloaded textures or the ones Maya has to offer. But to get our environments more realistic I had to UV map a lot of my imported textures so that it fit my faces and the stitches matched up. Once all of the textures had been applied which I set aside a couple lessons to complete as it was quite tricky and for one of my assets it took me quite a while to get the texture I wanted through Maya and it also took up a lot of space and made Maya fairly slow and un-responsive but to over come this once I was happy, the environment with all of my assets in and on each asset I deleted its history which meant I wouldn't be able to go back but also freed up some space and made it better. The other problem was that my assets were not all to one scale and so I had bins as big as lamp posts and cars the size of buildings. This was a simple fix of just resizing and so was fine. Another problem I came across towards the end was inserting the cameras and trying to get a 'background' so that it wasn't just black space behind my city however, for some reason every time I inserted a plane or another polygon it would automatically have a texture on it and if i tried to change it, it would change everything else such as my roads and buildings and so I just had to leave my background out which I felt made my environment not as good as it could have been.I learnt a lot of new skills in fact everything I did was new to me and so was a really good learning experience. I remember back to my first lesson where I found it hard to control looking at a simple pre built shape. And now I am happy with some of the skills I have learnt as I fell they are a fairly high skill level. Although I feel that I am better at focusing on one asset rather than an environment unless I was given a clear pre made plan as that is the type of 'creator' I am when it comes to environments. One of my strengths would have to be making my own shapes through the SV Curve tool as now I have used it a lot and feel quite comfortable to create some basic shapes. Additionally I would say one of my strengths would be my texturing, however, this might not reflect in my environment as a lot of my textures were the same and I didn't need to do a huge amount of it. I would really like to improve on using edge loops and lighting as I feel these are the skills that give a model that final finish and just top everything off; like the varnish on wood. Additionally I was unable to learn how to make a tracking camera due to my tight squeeze towards the end and the deadline but this is what would have made my video a lot better. Next time I would have also tried to add in different/ a wider range of what Maya has to offer and be more experimental as I found that although I would branch out I did have a comfort zone. Additionally I would have tried to adapt my scale so that everything looked more in proportion as I felt that from certain angles my skyscraper doesn't look that big in comparison. I also feel very comfortable with using the extrude tool to make interesting original and complex shapes. I used the extrude tool along with insert edge loop to create more faces that I needed to create my desired image or shape and add to its realism.
Having said this, I felt that I stuck to the brief really well as any changes I made or anything I created I was always thinking how to make it more futuristic and what type of city mine is and how I can construct this representation through just building and assets them self. However my rush at the end and when modelling on my car can clearly be seen and stand out which is all because I didn't plan as well as I could have and often left things until last minute but the majority of parts I stuck to the deadline. Next time I would plan a lot better and take into consideration any problems I would come across or any extra time I needed for slightly higher difficulty models. I do feel like I have overall learnt a huge amount through this project and exceeded my original intentions but due to my lack of knowledge about Maya some of my original intentions even though small were a little far out of reach as i would have liked to have a water feature in my environment. So overall I would say that I did successfully stick to the brief and made a well rounded environment with a lot of effort gone in the only problem being that my self doubt in my skill and also not being able to fully achieve exactly what I wanted from the beginning but then again I might have been a bit ambitious.
Subscribe to:
Posts (Atom)